Monday, December 27, 2010

Sexy Zebra, Double Chocolate & Pistacchio Biscotti

Hello all,

I have a great recipe to share with you today...


I'm not a fan of biscotti. There are only a few times when I could say that I really enjoyed one. However, I was flipping through my cookbook "Pasta Et Cetera" a la DiStasio and I came across this recipe. These cookies looked different from what I've seen - they looked beautiful & decadent. I loved how the bright green pistachios stood out against the dark chocolate.

The author of this cookbook, Josee DiStasio is a popular Montreal Chef- especially with the French speaking foodie community. She's also friends with another local Chef which I was lucky enough to cook with - Franca Mazza. Fun fact - Franca has appeared on Josee's show a few times.  I've never caught the show myself but I hear its great. I love to encourage and try recipes from local chefs. We have a lot to be proud of up here.


Check out her site to learn more about her.  
http://aladistasio.telequebec.tv/a_la_distasio/accueil.html

So, I made them. The result? They tasted as great as they looked. I added my own little twist to the recipe by making a kinda" zebra motif over top. They looked like....edgy.. modern....sexy Biscotti if that's possible...lol
Here is the recipe.

Makes 36 biscotti

Ingredients.
2 Cups of flour
1/2 Cup of Cocoa
1tsp of baking soda
1/2tsp of salt
1/4 Cup of of butter at room temp.
1 Cup of sugar
2 extra large eggs at room temp.
2tsp of vanilla extract
2tsp of almond essence 
1 Cup of whole, shelled pistachios (unsalted - can be found at any nut shop such as "Best Nuts" on St-John's in the West Island.
145g or 5oz of 58 to 70% Cocoa - finely chopped
*Keep a small amount of flour aside in case the dough is too sticky.

Directions
Preheat oven to 325. 

Cover a baking sheet with parchment paper

In a bowl sift flour cocoa, baking soda and salt - set aside

In a large bowl, beat the eggs and sugar with an electric mixer until well blended. Add eggs, one at a time and mix again after each addition.

Add the vanilla extract and Almond essence

With a wooden spoon, add the dry ingredients, the nuts and the chocolate, working the dough with your hands. Add some extra flour if dough is too sticky.

Divide the dough in two and roll into a log of about 10 inches in length and 3 inches in width. 
Cook at the center of the oven for 30 minutes or until the dough seems firm to the touch. 
With the help of two spatulas, place the logs on a cooling rack for about 20 mins ( i never wait long enough, Im too impatient)

Reduce the oven temperature to 300.

Place the logs on a cutting board. With a bread knife (Serrated) cut diagonal slices of about 1/2 and inch in width.

Lay them down on the baking sheet and continue to bake them for another 10 minutes.

Allow them to cool. Biscotti can be stored in an air tight container for about 2 weeks but they won't make it to two weeks, I guarantee it.

Once biscotti are cool, dip the top in some melted chocolate. - I usually just melt "Baker's" brand chocolate in the microwave.

I used semi-sweet and white chocolate and drizzled them over the tops of the cookies to give it that Zebra look.

Enjoy and of course, give me feedback!! xoxo

Thanks for reading!!


Sunday, November 14, 2010

Weeknight or Weekend Gourmet - Gnocchi with peas, crispy prosciutto. Must try!


Pictured: Gnocchi, with peas, crispy baked Serrano Ham (Spanish version of prosciutto), and a small scoop of lightly-lemon flavoured ricotta. 

Hello friends!

I am so excited to share this recipe with you. Its a real winner. When I tried it - I thought of you and said..."Must... blog!"

As you may or may not know, all I think about is..."what are we eating tonight, tomorrow, next week, & right now..." Especially now that I'm married and in charge of all the meals, I spend time, happily scouring my many cookbooks or the Food Network site for tasty& easy new recipes.
My faithful follower and fan, my husband (God bless him), is my guinea pig (like he has a choice) and he loves this one! He'll never tell me he hates something, he's a smart man, but I sure know when he LOVES something :)  With the praise, there is a funny downside. I constantly get blamed for any ounce of weight gained, tight fitting jeans and shirts..lol  Everything in moderation, honey. *Angelic smile*

Back to the recipe! Its super easy , its different, quick to prepare and looks beautiful! You'll love the different flavours and textures - the creamy tasting,soft gnocchi, the saltiness and crispiness of the prosciutto. OMG! Why do I do this to myself!? Its Sunday morning! Guess what I'm making tomorrow night!

Special notes before we start...

-For a weeknight dinner, I purchased ready-made gnocchi (shame on me) but thats what makes this recipe so quick to prepare. I didn't want you to read the recipe and think "What is she, nuts?? I can't make gnocchi from scratch on a weeknight!" lol

To note, for the Weekend Gourmet: I have made  Gnocchi using this recipe and its easy particularly because the potatoes are baked and not boiled. They came out fluffy and light and I did not have to add more flour than indicated. (I have included some pics of my process below.) 
Boiling potatoes to make gnocchi creates a lot of water , obviously,  and is harder to drain them fully. That CAN lead to having to add too much flour, causing the gnocchi to be too hard. Pebbles with peas, anyone?

- I use the Spanish version of prosciutto called Serrano Ham. I really prefer the flavor and has less fat.

- I've written this before - Please DO NOT use low fat or "0% Fat" ricotta.
   I don't know what that sh*t is.

- Unless you despise ricotta - please do not omit it. It adds another dimension of flavour and it is not too   lemony. All you need is a tablespoon of it per dish and it really adds something to it.
Although, inexplicably, my father doesn't eat Ricotta and had the dish without - he still loved it. But of course! It has crispy prosciutto on it for heaven's sake!


Side thought....I want to try this with Farfalle pasta instead of gnocchi. I imagine that it makes for a lighter dish. Why are Farfalle always paired up with peas, eh?

The following recipe is by Tyler Florence and was obtained on www.foodnetwork.com ....Enjoy!

Ingredients

Potato gnocchi:

  • 2 pounds (about 4) russet potatoes, or similar starchy/white variety (I had to use 6 to equal 2 pounds - if you have a scale,please weith them.)
  • 1 teaspoon salt
  • 1/4 teaspoon freshly grated nutmeg
  • 1/2 teaspoon baking powder
  • 1/2 cup grated Parmigiano-Reggiano
  • 1 egg white
  • 1 to 1 1/2 cups unbleached all-purpose flour
  • 1 1/2 cups frozen peas, thawed
  • 1/4 pound prosciutto
  • 1 large shallot, finely diced
  • Extra-virgin olive oil
  • Salt and pepper
  • 1 tablespoon butter
  • Grated Parmesan
  • 2 cups Lemon Ricotta, recipe follows

Directions

Preheat oven to 350 degrees F.
Scrub potatoes, pierce the skin with a fork, drizzle with olive oil and salt and place on a sheet pan. Place the sheet pan in the oven and bake for 45 minutes to 1 hour until they are easily pierced with a pairing knife. Allow the potatoes to cool slightly then peel the potatoes while they are still hot and press them through a potato ricer. Put the potatoes in a large bowl with salt, nutmeg, baking powder, gratedcheese and egg white. Add the flour a little at a time and mix with your hands until the mixture forms a rough dough. Do not over-work the dough. Transfer the dough to a lightly floured surface. Gently knead the dough for 1 or 2 minutes until smooth, adding a little bit more flour, if necessary, to keep it from sticking.
Break off a piece of the dough and roll it back and forth into a rope, about the thickness of your index finger. Cut the rope into 1-inch pieces. Gently roll each piece down the prongs of a fork while pressing a small dimple with your finger in the back. The gnocchi should be slightly curved and marked with ridges. This will allow the pillows to hold sauce when served. Cover with plastic wrap and refrigerate for up to 12 hours.
Boil the gnocchi in batches in plenty of salted water. The gnocchi are done about 2 minutes after theyfloat to the surface, remove with a slotted spoon. Reserve about 1/2 cup cooking water. If not cooking immediately, place the gnocchi in a single layer on a baking pan dusted with flour.
Note: If the gnocchi start to feather and fall apart in boiling water, you need more flour. If the gnocchi don't float after 2 minutes and are hard, you used too much flour.
(Quick weekday part)
Blanch peas in hot water and set aside.
Place 4 strips of prosciutto on a sheet pan and place in a preheated 350 degree F oven. Cook until the bacon is crispy, 8 to 10 minutes.
Add chopped shallots to a pan over medium high heat with 2 counts of olive oil pan of and gently saute until fragrant and translucent. Dump in the peas and toss gently to coat. Season with a little salt and pepper. Add boiled gnocchi to the pan and gently toss. Add a ladle of gnocchi water to the pan, add 1 tablespoon of butter, sprinkle with Parmesan and season with salt and pepper. Serve topped with crispy prosciutto and a scoop of fresh lemon ricotta. (Optional: finish with a drizzle of white truffle oil)

Lemon Ricotta:

  • 2 cups good quality ricotta cheese
  • lemon, zested and juiced
  • Salt
Place the ricotta cheese in a mixing bowl and add the lemon zest and juice. Season with salt and serve with the gnocchi.
Yield: 4 to 6 servings
Here are the pics of my Gnocchi making process!

I have a potato ricer,  I love it.
I used whole-wheat flour.
TIP: You have to peel your baked potatoes while they are still quite hot. I was not in the mood for a game of Hot Potato so, I held the potato in one hand with an oven mitt and quickly peeled with the other hand. It was easy. I don't have pics of this process because its a little hard to do that when your hands are full. :)
 You'll notice that I have not mastered the gnocchi shaping process...with the fork. I guess I'll have to practice.


Saturday, October 16, 2010

Tiramisu, My-misu, Franca-misu...its all good-misu


Hello Vanillabeaners!

For my bridal shower, I had the opportunity to see Chef Franca Mazza in action. My shower took place at Atelier Franca Mazza at the Marche 440 in Laval. You can either attend one of her cooking classes where she explores different themes such as appetizers for instance, or fois gras... OR..you can have a private dinner there with your friends (with or without cooking instruction). I highly recommend this to anyone who loves good food and wants to try something new.

At my shower she and her suchef Pino showed us how to make her version of a Tiramisu. It is made with green tea instead of coffee.

Here it is:

Franca's Green tea & Strawberry Tiramisu

Ingredients

-2 cups of 35% cooking cream (yikes!! - yeah but what the heck did you think it was made of..lol)
-500G of Mascarpone cheese
-60ML of Gagliano liqueur
-1 + 1/2 cups of granulated sugar
-2 vanilla beans worth of seeds (scrape them out of the pod with a sharp knife)
-4 cups of steeped green tea
-12 ladyfinger cookies
-1 cup of sliced Strawberries.

Directions

Using an electric mixer, combine cream, mascarpone, Gagliano liqueur and sugar. (it should be pretty stiff but not as much as plain whipped cream would be. This mixture is heavier. - As long as its not liquidy)
Scrape the vanilla beans and add seeds to mixture.
Dip ladyfingers quickly in green tea and start layering putting the cookies at the bottom.
Add strawberries and top with cream mixture - repeat and finish with cream.

That's it!!

NOW...I'm more of a traditional tiramisu kinda' girl....actually to be completely honest - I never really liked Tiramisu at all but if I gotta' have it, it has to be with coffee - like my mother makes it (and DaEmma's but we won't talk about that..lol my mother doesn't like me saying that)

So I followed Franca's recipe but substituted the green tea for coffee and the liqueur with Kahlua or Irish Cream. (I always make a mistake and call it Irish Spring for some reason. DO NOT USE IRISH SPRING - lol sounds like the warning on my hairdryer "Do not use while sleeping" lol)


Also, I only put strawberries on top. (I did not add them to the layers.)
Then I grated some chocolate over-top and garnished with mint leaves.

I made individual ones in glasses, they looked pretty but they were wayyy too much for one person - lol.

I really want to try Banana-misu - my friend David Ialenti gave me the idea. I'll keep you posted!!

Steph

Friday, October 1, 2010

Newlywed Pizza continued...Calzone con Bietole e Olive


Calzone con Bietole e Olive

Use 1/2 of the basic pizza dough for 1 calzone.

For the filling
1+1/2 lbs of Swiss chard or fresh spinach 
4 tbsp extra virgin olive oil
2 garlic cloves, minced (center removed)
3/4 cup of pitted black olives, halved
1/2 cup of fresh whole mozzarella drained and diced ( i also mixed in Tallegio cheese)
1/4 lbs (110g) of Speck or prosciutto crudo
Salt and pepper - to taste
(Optional) A pinch of chili pepper flakes

Pan
2bsp olive oil to oil pan
Coarse corn flour, to sprinkle over oiled pan

To top the calzone
1 garlic clove, minced
1tbsp extra-virgin olive oil
1/2 tsp crumbled try oregano leaves
(Optional) 1/4 tsp of hot chili pepper flakes
2 sprigs of rosemary, cut into 1-inch pieces

Preheat oven to 450

Remove stems from the chard or spinach and place the leaves in a bowl of cold water. 
Wash thoroughly, changing the water several times.
Bring a stock pot of cold, salted water to a boil 
Drain the chard and add to the pot
Cook uncovered until soft, over medium heat
Drain and squeeze excess water from the greens
Finely chop the greens
Heat the oil in a skillet over high heat. Add the chard and cook for 1 minute. 
Lower the heat to medium, stir in the garlic and olives.
Season with salt and pepper
add chili flakes if using
Stir thoroughly and remove from heat. Let cool

Roll out the douch into a 16 inch or 40 cm disk.
Place the chard mixture over half of the circle (beause you're going to have to flip the other side over it)
Leave about 1-inch border clear in order to later seal the calzone. 
Place the mozzarella and sliced prosciutto over the chard. 
Fold the dough over the mixture, then pinch the edges of the calzone with your fingertips to seal it.

Oil a baking sheet and sprinkle with coarse corn flour. Place the calzone on the prepared baking sheet. Brush the calzone with the garlic and oil.
Sprinkle the dried oregano and hot chili pepper flakes (if using) 
Insert the rosemary pieces evenly along he border. 

Using a sharp knife, make three diagonal slits on the calzone.

Bake until crisp and golden (about 35-40 min)
Remove from the oven, drizzle with a little olive oil and sprinkle with sea salt. 
Cut into slices and serve, preferably hot.

yield: 6 - 8 servings.


Tuesday, June 15, 2010

Crostata di Lamponi - My RaspberryTart


Hi Guys,

How berry nice of you to drop in! 

Lamponi is Italian for Raspberries. I got the recipe from one of my favorite cookbooks called "Florence" by Williams-Sonoma.

Ever feel like flying to Florence but just don't  have the time??
Make this dessert, sit on your balcony on a warm night, close your eyes, take a bite and pretend you're there! Why not have a Prosecco with that?... Sure, I'll have a Prosecco....Now, imgine George Clooney...George? Ok. Why not....That will surely help the imagination along.  Next, you'll need  some peircingly loud ambulance or police sirens and you're practically there!  
*Poof!* -  Day dream over - for now.

(Little note about my beloved Florence:
Everyone who's been there knows that it is one of the most beautiful cities in the world but the abulance and police sirens are super loud - it freaks me out - its heart stopping when you're in relaxation mode! We were like .."Who's injured again!!? Where are we, the ghetto!? Who's been arrested??...its only been 90 times today!!") (In tense moments, we speak like Dane Cook or Rodney Dangerfield )

Ok. back to the dessert...
Even though this is a Raspberry tart recipe, feel free to add whatever berries you like as long as they are similar in size. 

I would call this a "dainty" dessert. No heavy cheesecake, no chocolate, no cakey texture. This is a light, fruity dessert..great when served with coffee or tea but it should be paired with a dessert wine or even a Prosecco. That stuff goes with anything!

Don't let the picture throw you off. It looked difficult to me too when I first saw the recipe. In truth, it was simple. For instance, the dough is a no-brainer. Take it from someone that has had many, many failed dough attempts. Try it.


Here is the recipe:


Ingredients

Crust:
3/4 cup of unsalted butter, at room temp
1 large egg

1/3 cup of granulated sugar
2 cups of flour - preferably soft cake&pastry flower (they sell small bags at IGA)

I added a nice pinch of Cinnamon - I recommend it.

Custard  A.K.A - Cholesterol
3 cups of whole milk ( I used 3.25)
Now hold on to your hats.... 8 large egg yolks (save the whites and make an omelet)
3/4 cup of granulated sugar
1/4 cup of cornstarch

Topping:
2 cups of raspberries (or any fresh berries)
Confectioner's sugar  (icing sugar) for dusting

To make the crust, in a large bowl, use a wooden spoon to combine the butter, egg and sugar.
Add the flour and mix with the wooden spoon until a homogeneous dough forms.
Roll into a ball and cover with plastic wrap.
Refrigerate at least 2 hours , up to 8 hours.

-Preheat your oven to 400 F.
-Butter a 9 1/2 inch tart pan with removable bottom (preferably with straight sides) - I used my regular spring form pan and it worked out fine too.
-Unwrap the refrigerated dough and place onto a lightly floured work surface. (let the dough sit a bit if its too hard to work with. Its tough when its cold)
-Using a lightly floured rolling pin, roll the dough out into a round, 1/8th inch (2-3 mm) thick.
-Separate the tart pan bottom from the sides.
-Lay the dough round over the bottom, then trim the overhanging dough.
-Replace the dough-lined bottom into the pan sides.
-Gather up the dough scraps and roll it into a rope about as thick as a finger.
-Lay the rope along the inside edge of the pan and press it into the bottom and up the sides of the pan to a height of 3/4inch (2cm).
-If desired create a zigzag edge by using a knife to cut the dough so that its edges form triangular points. (up sidown triangle cutouts)

-Line the inside of the tart shell with foil.
-Fill the pan with a generous layer of dried beans or pie weights (this will stop the dough from bubbling and becoming uneven.)
-Bake until pale and dry, about 30 minutes.
-Remove the beans and foil
-Return the crust to the oven and bake until golden - about 5 more minutes
-Let cool. Then carefully remove the crust from the tart pan and transfer to your serving plate. Set aside.


To make the Custard, in a heavy saucepan over medium heat, warm the milk until small bubbles appear along the edges of the pan, about 5 min.

-Meanwhile in a bowl, combine the egg yolks, granulated sugar and cornstarch. Whisk until pale and creamy.

-Whisking constantly, slowly add about 1/2 cup of the warm milk to the egg mixture.
-Return the egg mixture to the remaining milk in the saucepan and cook, whisking constantly until the mixture begins to thicken and begins to bubble around the edges of the pan, 5-8 min.
-Remove from the heat and continue stirring for 1 minute longer. Pour the custard through a medium mesh sieve into a bowl. (I used a colander with small holes - it worked)
-Let it cool slightly, stirring occasionally, then pour the custard into the tart crust using a rubber spatula to distribute evenly.


When the custard has cooled completely, arrange the raspberries in a single layer.

Dust lightly with confectioner's sugar and serve.  

Note: make sure to dust your tart with the sugar right before serving because the natural juices from the fruit and/or condensation will dissolve the sugar after a few minutes.

Nice option:
Barefoot Contessa has a similar recipe but she uses Raspberry jam instead of Custard.  
This was exactly the way it was served to us in Florence -at Cibreo, a quaint cafe located right near my sister's and cousin's apartment. What a gem.
So anyway, I made the crust shown in this recipe but used the jam. It adds a nice tang and just feels lighter. Note: Don't buy jam with chunky pieces of fruit in it.


Favorite Jam quote:

"Sir, the radar appears to be ...jammed."
"Hmm..Raspberry. There's only one man who would dare give me the Raspberry... LONE STAR!!!"
Whomever guesses where that quote is from will be in my heart forever.

DON'T Google it - cheaters! 

Now take a look about my pictures.


 Then I performed an experiment...I had these sturdy gold foiled cupcake liners so I decided to make mini tarts. I bought these liners at Ares Kitchen Supplies.
Anyways, they turned out great!


Voila! Enjoy.

Wednesday, April 28, 2010

Le Garde-Manger Restaurant


Le Garde-Manger Restaurant
408, St-Francois-Xavier (Corner St-Paul)
Old Montreal
514-678-5044


I was fascinated by this restaurant and admittedly by the restaurant's celebrity chef, Chuck Huges.

The restaurant looks cool, sounds cool and the chef has tattoos of his favorite foods!! Yeah! He's got lemon meringue pie on his arm!! That's my favorite dessert too!

Anyway, I was introduced to this restaurant because I was watching the food network (no kidding) and I stumbled upon this show called "Chuck's Day Off", which is filmed at the restaurant.  He makes great looking food seem so effortless to make. Doesn't hurt that he's kinda' cute too.  -That was it, after one show, I had to go to Le Garde-Manger.

It wasn't easy..for a party of 2 on a Saturday evening, we were looking at about a month long wait. That's crazy...I told the girl on the phone that I was flexible with the time..so she said brightly, "OK! We have space in two Saturdays from now, at 10pm, at the bar"    Urrhhhhh!

I finally ended up going with my sister at some point, after collecting dust and cobwebs.

We were so excited, we loved the ambiance. We were seated right away and it didn't take us long to notice the great music playing. The restaurant's play list is awesome..We were singing along the whole evening - lots of older songs including Led Zep  - loved  it!

It seems to be a hot spot for the 5 a7 crowd. Very nice-looking patrons too, business people and some "city people" as I call them..it was a healthy mix. The feel was vibrant and a little bohemian. I wanna say "shabby-chic" but don't know if its the appropriate term.

To start we, of course, tried the Lobster Poutine - so Quebecois and so good. The fries are similar to McDonald's in size, the gravy- a veal reduction sauce. They were very generous with the cheese and the lobster.  The lobster was so tender - no chewiness whatsoever. I cannot even describe how good this was- it rocked. We were fighting over the last bits. We also tried the tomato salad with avocado. When my sister proposed this..I thought it would be ordinary but these were the best, freshest tasting tomatoes ever :) They tasted as if they were straight from the garden. Besides that, there was such a great combo of flavors in this dish. We couldn't pin-point what it was that made this salad so special and the waiter suggested that its the dill  - "it makes all the difference".

For my main I chose the short rib, which was very tender, falling off the bone, saucy and so tasty
However, this is where the celebration and cart wheels ended. I found what I thought was a piece of clear plastic in my plate..I picked it up, examined it..I tried pulling it apart to see if it was a piece of onion. It wouldn't break.  In a braised meat dish, if it had been an onion , it would have fallen apart right away.
I told the waiter and he brought it back to the kitchen straight away..I could see right into the kitchen. (they have an open concept kitchen , which I like, where you can watch the crew of young and hip looking chefs do their thing. They wear a modern black "uniform", with caps rather than traditional chef headgear) Anyways....
I saw a group of them peering over my plate at the plastic/onion.  Minutes later the waiter returned without my plate and told me that it was an onion - for sure!  He asked if I wanted my plate back..at this point I was a little turned off and said "no"  I was positive that it wasn't an onion. (for the record, my sister didn't think it was an onion either)..I was further turned off when they didn't even offer anything, not even a drink or at least ask me if I'd like to have something else. Maybe I shouldn't have expected anything, I don't know.
My sister had ordered the Bavette with fries. She found that the meat was tough and said it was mediocre at best. Too bad.

I did not try the fried Mars Bar but I hear its the best thing there..That, and the seafood platter.

I decided to give this place another chance, thinking that over all, I really had a good experience , except for that one little, itty-bitty incident. I'm a forgiving person. :) So, I went back with my fiance, Andre.

I told him we had to have the Lobster Poutine. Sadly it was a disappointment..the portion was smaller than the last time..not much of anything..lobster or cheese. He loved the tomato salad though, couldn't stop talking about how fresh the tomatoes tasted..lol..Those freakin' tomatoes...the most consistant thing on the menu.

For Andre's main, I struck out once again. I told him to try the short-rib dish..sans plastic
It tasted boiled..no flavor. I know that its common practice to boil ribs to tenderize them and then bake them, basting them with sauce. My guess here is that they boiled it but did not baste long enough..

For my main I had...hmmmm...I can't remember. That can't be good.

Unfortunately, the only way I'll go back at this point would be for a 5 a7 to enjoy the music and ambiance and I would share a bunch of the appetizers with friends. Hey, I still haven't tasted their famous seafood platter.

Hey Chuck! I hear you're never at the restaurant anymore - maybe you should be.

Sadly, I give this restaurant 2.5 stars, until Chef Chuck comes back to us.

Love,
Steph

Seriously, I see Chuck here, I see customers...when the heck was this taken??


The "I think I'm number 1" Carrot Cake


Hi Everyone!

I'd like to share my friend Marie's carrot cake recipe with you. I made it the other day and it was FANTASTIC!!

Here you go!


Carrot Cake 
 
Cake ingredients:
 
2 cups flour
2 tsp. baking soda
1 ½ tsp. baking powder
2 tsp. cinnamon
1 tsp. salt
1 ½ cup oil
2 cups sugar
4 eggs
1 tsp. vanilla
2 cups grated carrots
1 cup chopped walnuts
1 ¼ cup crushed pineapple (without the juice)

Icing ingredients:

2 cups icing sugar
½ cup soft butter or margarine
1 pqt. 125 g. cream cheese
1 tsp. vanilla


Mix flour, baking soda, baking powder, cinnamon and salt. 
In another bowl, mix oil, sugar, eggs, vanilla and beat until fluffy, aprox 5 min. 
Add carrots, nuts and pineapple. 
Incorporate the flour mixture in 3 times. Pour in a greased and floured rectangular mold of 9x13. Cook at 350 F for 55 to 60 minutes. (Or any mold you wish to use)


Icing:
Filter icing sugar. Beat butter and cream cheese together and add vanilla. Add icing sugar gradually and beat until creamy. Spread on the cake.

I hope you enjoy this recipe.
For those who've tried my carrot cake, feel free to post your comments!  
Am I number 1 after all?? :)


Friday, April 9, 2010

Rotisserie Chicken saved me! Quick Rotisserie Chicken salad with goat cheese and dried cranberries!

Did I ever tell you guys that the cooked rotisserie chicken from the grocery store has saved my life!? 


Ok, I'm being dramatic again..but it has saved me on days when I am tired and don't have the energy to cook something elaborate and it has probably saved my relationship on a few occasions..lol
I've made fajitas, tostadas and much more with it. You can make soup...the possibilities are endless.

Yesterday we made an amazing rotisserie chicken salad. Sounds BORING but its not. Its so good that you'll want to make sure that you get a little bit of every ingredient, in every bite!

Now, I know you guys are food lovers and have probably eaten it this way before but just in case, here goes!

Ingredients
Qtys: as much as you like! - just ensure there's a balance...so that one ingredient doesn't overpower the others.


-Your favorite olive oil and balsamic dressing + herb seasoning (oregano, for example)
-Arugula - torn
-Romaine - torn (or other favorite salad)
-Your favorite goat cheese - crumbled 
-A nice handful of dried cranberries

-Red Onion - thinly sliced .. (I use about half  or less than half of a large red onion depending on the size of the salad. You don't want the onion to be too overpowering).
-Rotisserie Chicken - mixture of white and brown meat cut into bite size peices (brown meat in this dish is a must for me) If you've ever had roasted quail salad or duck salad , you'll know what I mean. The texture and taste of the brown meat goes so well with the sweet flavor of the Cranberries)
-A handful of Walnuts or Pecans (Optional)
-Salt/Pepper

Its so good, peppery, sweet, salty..It has everything and it looks pretty too!

Enjoy with a fresh baguette!

Have I made you hungry again?? I do that.

Thursday, April 8, 2010

David's Delicious Duck Confit

Hi Vanilla-Beaners!!


I have a very exciting recipe for you today!

My friend and follower of Vanilla Bean, David , asked if I would be interested in posting his recipe on my blog. I said "Of course!" Although, I've never attempted cooking duck. He offered to cook it, take pictures and everything! I obviously agreed and I was honestly flattered.

So, Tuesday morning comes around and I had forgotten David's promise. Not only had he sent me the recipe and pics, he even gave me a SAMPLE!! I was totally over the moon! That evening, I followed his re-heating instructions, making sure to put it on broil at the very end to crisp up the skin. It was beautiful. I shared it with my family. My sister who really likes duck, said it was the best duck she's ever had! My father, who's never had tried it , really loved it. He was surprised at how great duck could be.

It was increadibly tasty, moist on the inside and crispy on the outside. David had said to me, "Make sure to try some of the fat! Its not like other animal fats- taste it." lol I guess he knows I'm squeamish about fat.
So I did try it, with some reservation, squinting my eyes, getting ready .....but he was right, its nothing like chicken fat or anything like that. It melts in your mouth and has a buttery texture. I never thought I'd feel this way about FAT! lol

The following is in David's words. I'm sure you'll enjoy reading this as much as I did.

(David)- First, you’ll need some basic ingredients like duck legs & duck fat. I always buy my legs directly at Le canard du Lac Brome in Knowlton (my brother lives in Granby). They have another store in Montreal, but they didn’t tell me if they sold legs in bulk (10 legs for roughly $35). You can also buy legs from “Les Champs d’Élisé”. The legs are bigger, the ducks there are “force-fed” since they produce Foie Gras. The legs can be had fresh or frozen. If the legs are frozen just let them thaw for a couple of days in the fridge.

The duck fat can be bought almost anywhere, here have 2 X 670g on right, the left container was left over from the previous batch. That’s the good thing, cooking a new batch of legs will give you more fat, and the fat can be reused.
 

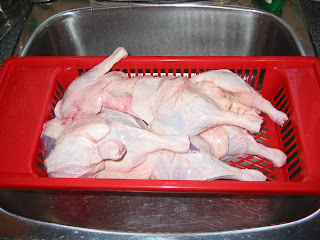
First step is to rinse the legs. We are dealing with poultry, so we must be very careful not to cross-contaminate utensils and plates, and we must wash hands regularly !

OK, now time to prepare the rub … Just mix in a bowl:

· 4 tablespoons of sea/coarse salt

· 2 tablespoons of whole peppercorns

· 2 tablespoons of garlic (went the lazy way and took dehydrated this time)

· 2 tablespoons of rosemary (I was out, so I used herbes de Provence)

Like you can tell, you can improvise with this at will …


Then rub each leg with the mix and put in a container. Cover and refrigerate for 24 hours.

Good morning! This is what we look like after a day in salted rub ! The salt is going to “disgorge” the meat (removes water-don’t know if this is how you say it in English…). Obviously the mix provide all those yummy flavours too.
Time to rinse and pat the legs dry… We want to remove the salt mainly
                                     
Place the legs, meat side down/fat side up, in oven casserole dishes.
                                     
Now is time to use that fat … But we need to melt it first !
                                    
Then we pour the fat over the legs. There's no need to cover them completely, as long as the meaty part is submerged in the“juice”
                                   
Then, cook for 2 hours in the oven at low heat, say 250-275 degrees. We don’t want to boil the legs, just let them cook in the fat. The fat can simmer a little, but not boil.

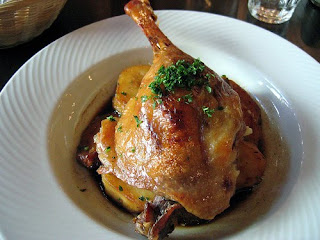
And here is the final result:

Remove the legs from the pans, drain & filter the fat. Freeze it, you can reuse it for another batch, or you can also use it to replace butter in recipes (sautéed veggies in duck fat is HEAVENLY )

Besides, duck fat is a "good fat", much like olive oil. This lovely yellow oil is going to become white fand solid when cooled !
You can freeze the legs and eat them at a later date. Be sure to thaw them in the fridge - thawing them on the counter may promote bacteria growth and we wouldn't want that! 

To re-heat, just put them in the oven @ 350 for about 15-20 minutes, then broil them to make the skin crisp and yummy. And go ahead, you can eat some of the fat too…

You can serve them with veggies, rice (basmati is good) but also couscous, they go along with almost anything ! Mushroom risotto ?! Thank God my keyboard is drool-resistant !

You can also use the meat to make raviolis, dumplings, etc …

This dish comes from France’s Sud-Ouest (Périgord), so it is a natural match for the wines of that region… Madiran, Cahors, etc … But many full bodied red wines will do.


Stephanie's mention: Thank you David for being a follower of Vanilla Bean, for providing this wonderfully detailed post and of course, for giving me the opportunity to taste it!!!

Merci!!

Wednesday, April 7, 2010

Featured Food: Cilantro

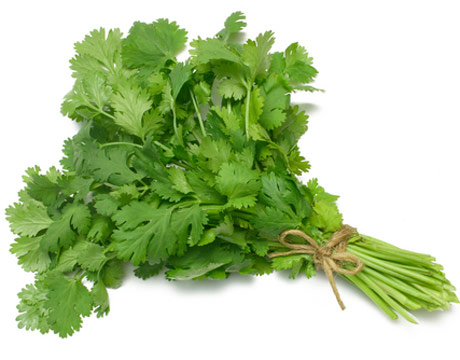
Featured Food : Cilantro – Parsley’s more interesting twin.

I've learned that quite a few of our Vanilla-Beaners aren't fans of Cilantro. What a cryin' shame

Cilantro looks exactly like Parsley except that its packed with flavor. Parsley is great too but can be a little bland.  I read somewhere that Cilantro's flavor is often simply described as "fresh"..lol.. I'll also add that it has a smokeyness to it too. Its hard to describe.


Lovely Cilantro is most popular in Southwestern and Asian cuisines. I can't get enough of it..Cilantro milkshake anyone?? KIDDING! When you chop it, the smell makes your senses come alive! Try it, chop some, you'll see.
It adds that needed "je ne sais quoi" many dishes including Guacamole - (not  the armpit “je ne sais quoi” – that’s Cumin hehe - many people confuse Cilantro with Cumin because they, uh, both start with the letter "C" and are both common in Mexican cuisine but they could not be more different!!)

Its best eaten fresh, uncooked, chopped and added to a dish as garnish. Use it in tuna salad, in any mexican dish as garnish or top an asian stir-fry with it (with some sprinkled lime juice).

Fun fact : Cilantro is a member of the carrot family!

Health info and other facts

I've learned that Cilantro seems to have some very interesting, super health benefits. For example, it's been shown to rid the body and blood of excess metals including lead and aluminum. I don't know where we aquire lead....but I want it out!

It also helps the body beat and prevent many bacterial and viral infections!

Cilantro gets major recognition for diabetic support too. In fact, Cilantro is known in some parts of Europe as the "anti-diabetic plant." In parts of India, it is renowned for its anti-inflammatory benefits and in the United States it is said to lower cholesterol.

Also, a compound found within Cilantro is twice as effective as the commonly used antibiotic "Gentamicin" - which is used to kill the Salmonella bacteria! Yes, you read correctly!

Hang on!!.... there's more....
  • Helps improve digestion and intestinal discomfort ( relieves intestinal gas - woohoo! )
  • Helps treat symptoms of arthritis
  • Protection against urinary tract infections
  • Helps prevent and treat nausea - much like Ginger, which happens to be very good friends with Cilantro!  
  • A good source of dietary fiber
  • A good source of magnesium, and iron
  • Rich in phytonutrients and flavonoids (they help fight free radicals in the body - which means this herb has nutrients that help fight certain cancers)
  • Known to reduce excess mercury in the body  - now you can eat Tuna! In fact, eat tuna with cilantro!
Have a great day guys and please give this herb a chance!